How Neutral Buoyancy Cables Can Improve Your Subsea Operations Efficiency
Subsea efficiency is rarely about “going faster.” Offshore, efficiency means finishing the planned work inside the weather window with fewer interruptions—less repositioning, fewer recoveries, fewer troubleshooting stops, and fewer cable-related near-misses. When operations slip, the root cause is often hidden time: minutes lost to tether drag, unstable station-keeping, snag avoidance, intermittent faults, or conservative piloting because the system feels unpredictable.
One of the highest-leverage ways to reduce hidden time is to improve cable behavior in the water column. Teams spend heavily on vehicles and sensors, but the tether often decides how smooth the mission feels. A Neutral Buoyancy Cable is engineered so its effective weight in water is close to zero. When applied to the right mission profiles, it can reduce seabed drag, stabilize cable geometry in current, lower pilot workload, and reduce termination stress—directly improving operational efficiency.
This article explains how neutral buoyancy improves efficiency, when it is the right choice, when it isn’t, and how to verify it will deliver value before you commit. You’ll get a practical decision matrix, field-style “symptom → diagnosis → fix” cues, and a deployment/acceptance checklist that reflects how experienced teams reduce downtime.
What “Efficiency” Really Means Offshore
If you track real project delays, they usually fall into a few repeatable buckets:
-
time lost correcting tether drag or sweep
-
time lost avoiding snag hazards near structures
-
time lost due to unstable station-keeping in current
-
time lost investigating intermittent comms/video faults
-
time lost to extra recoveries and re-deployments
-
time lost because pilots must operate slowly to stay safe
Neutral buoyancy improves efficiency when it reduces the frequency and severity of these events, not when it changes a single headline spec.
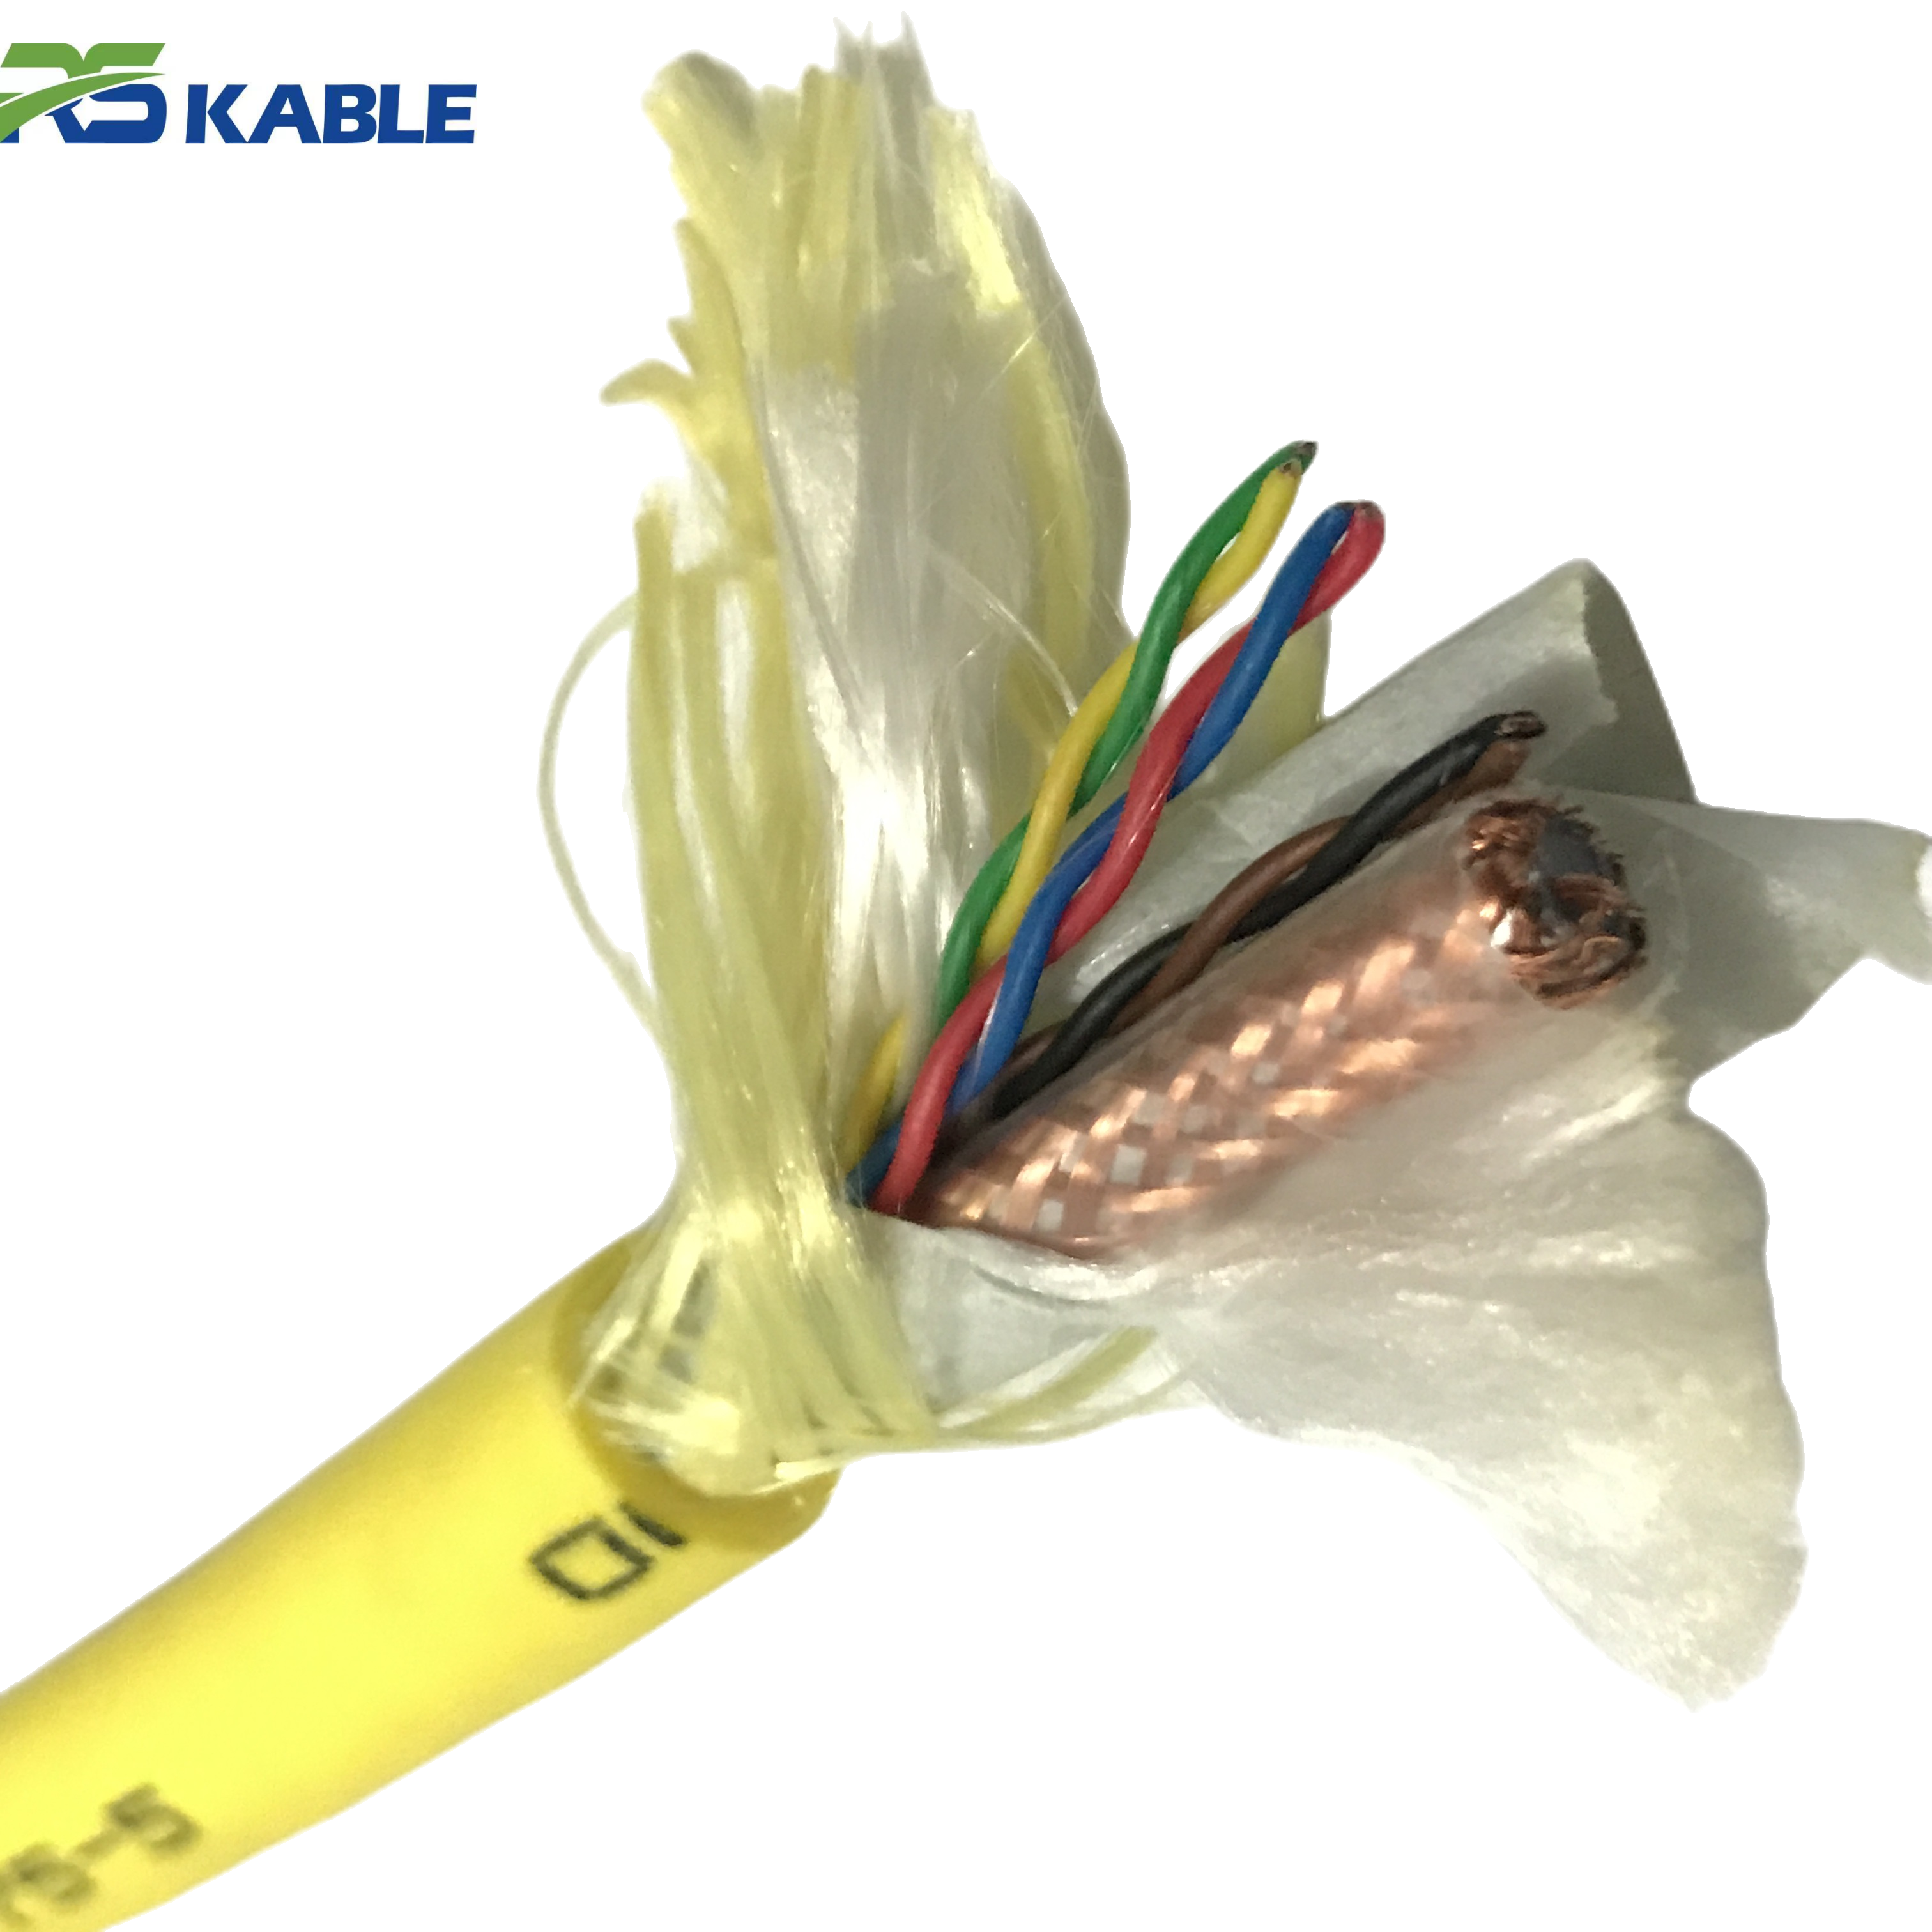
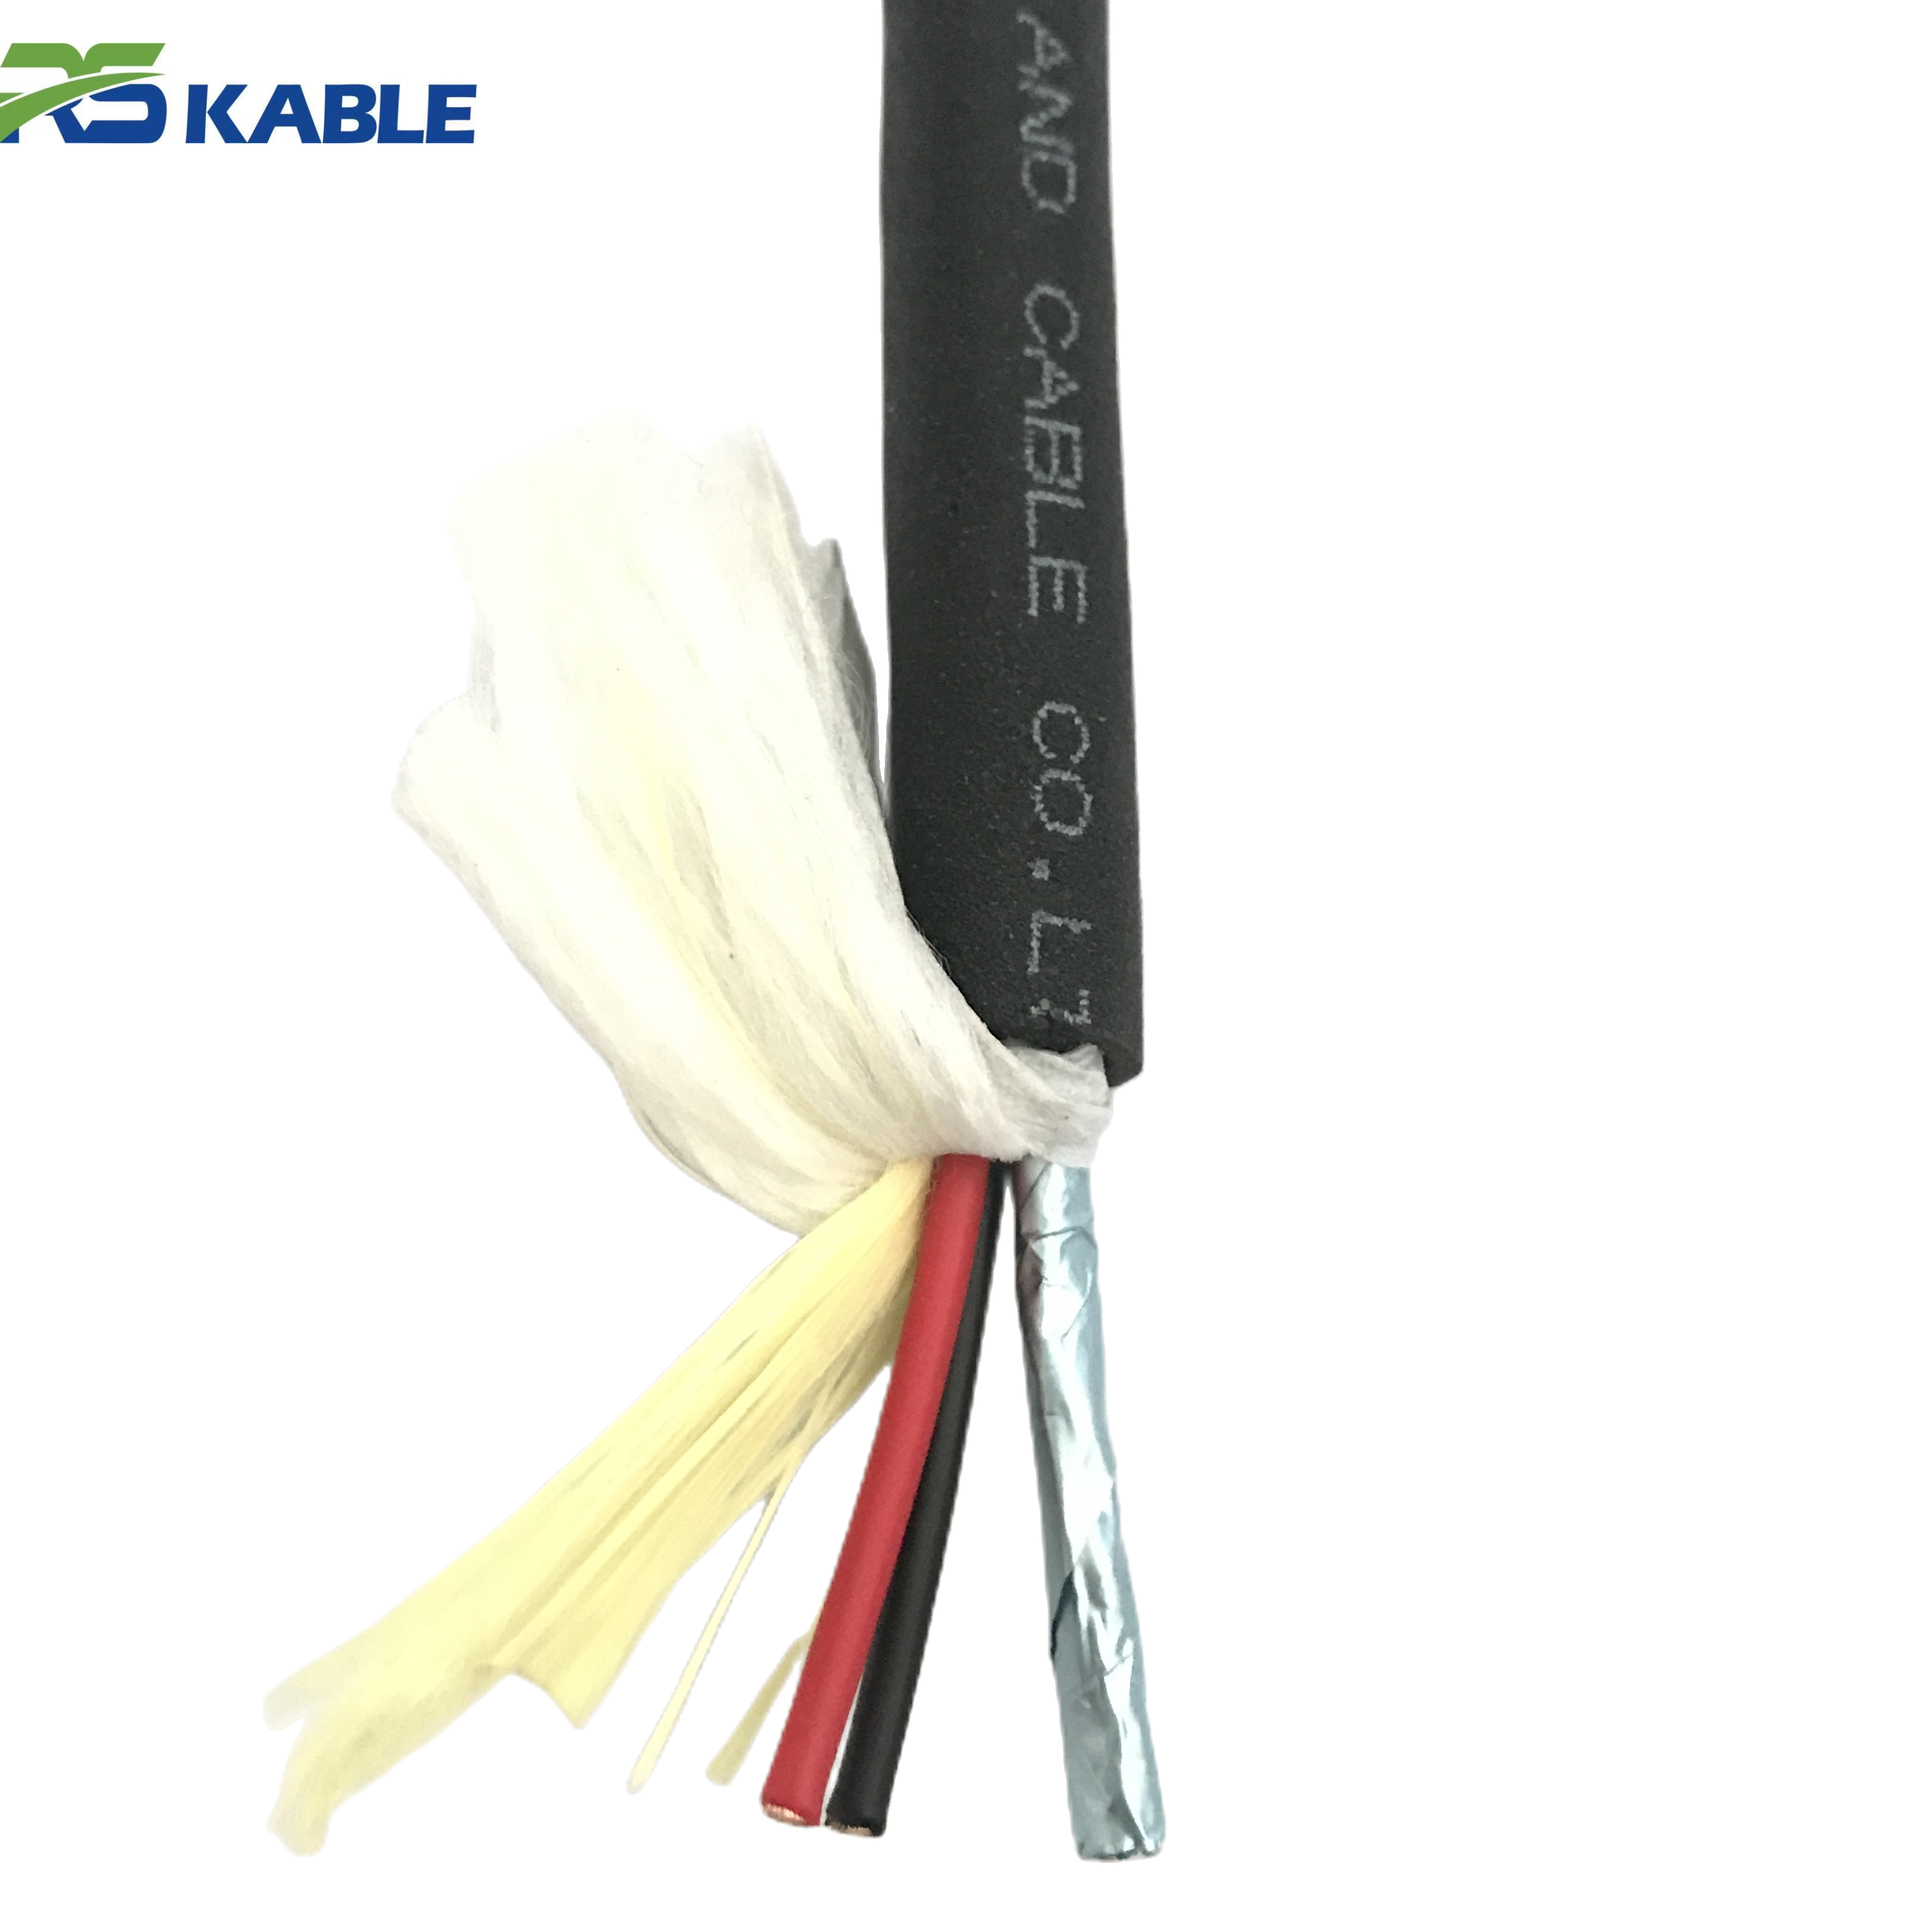
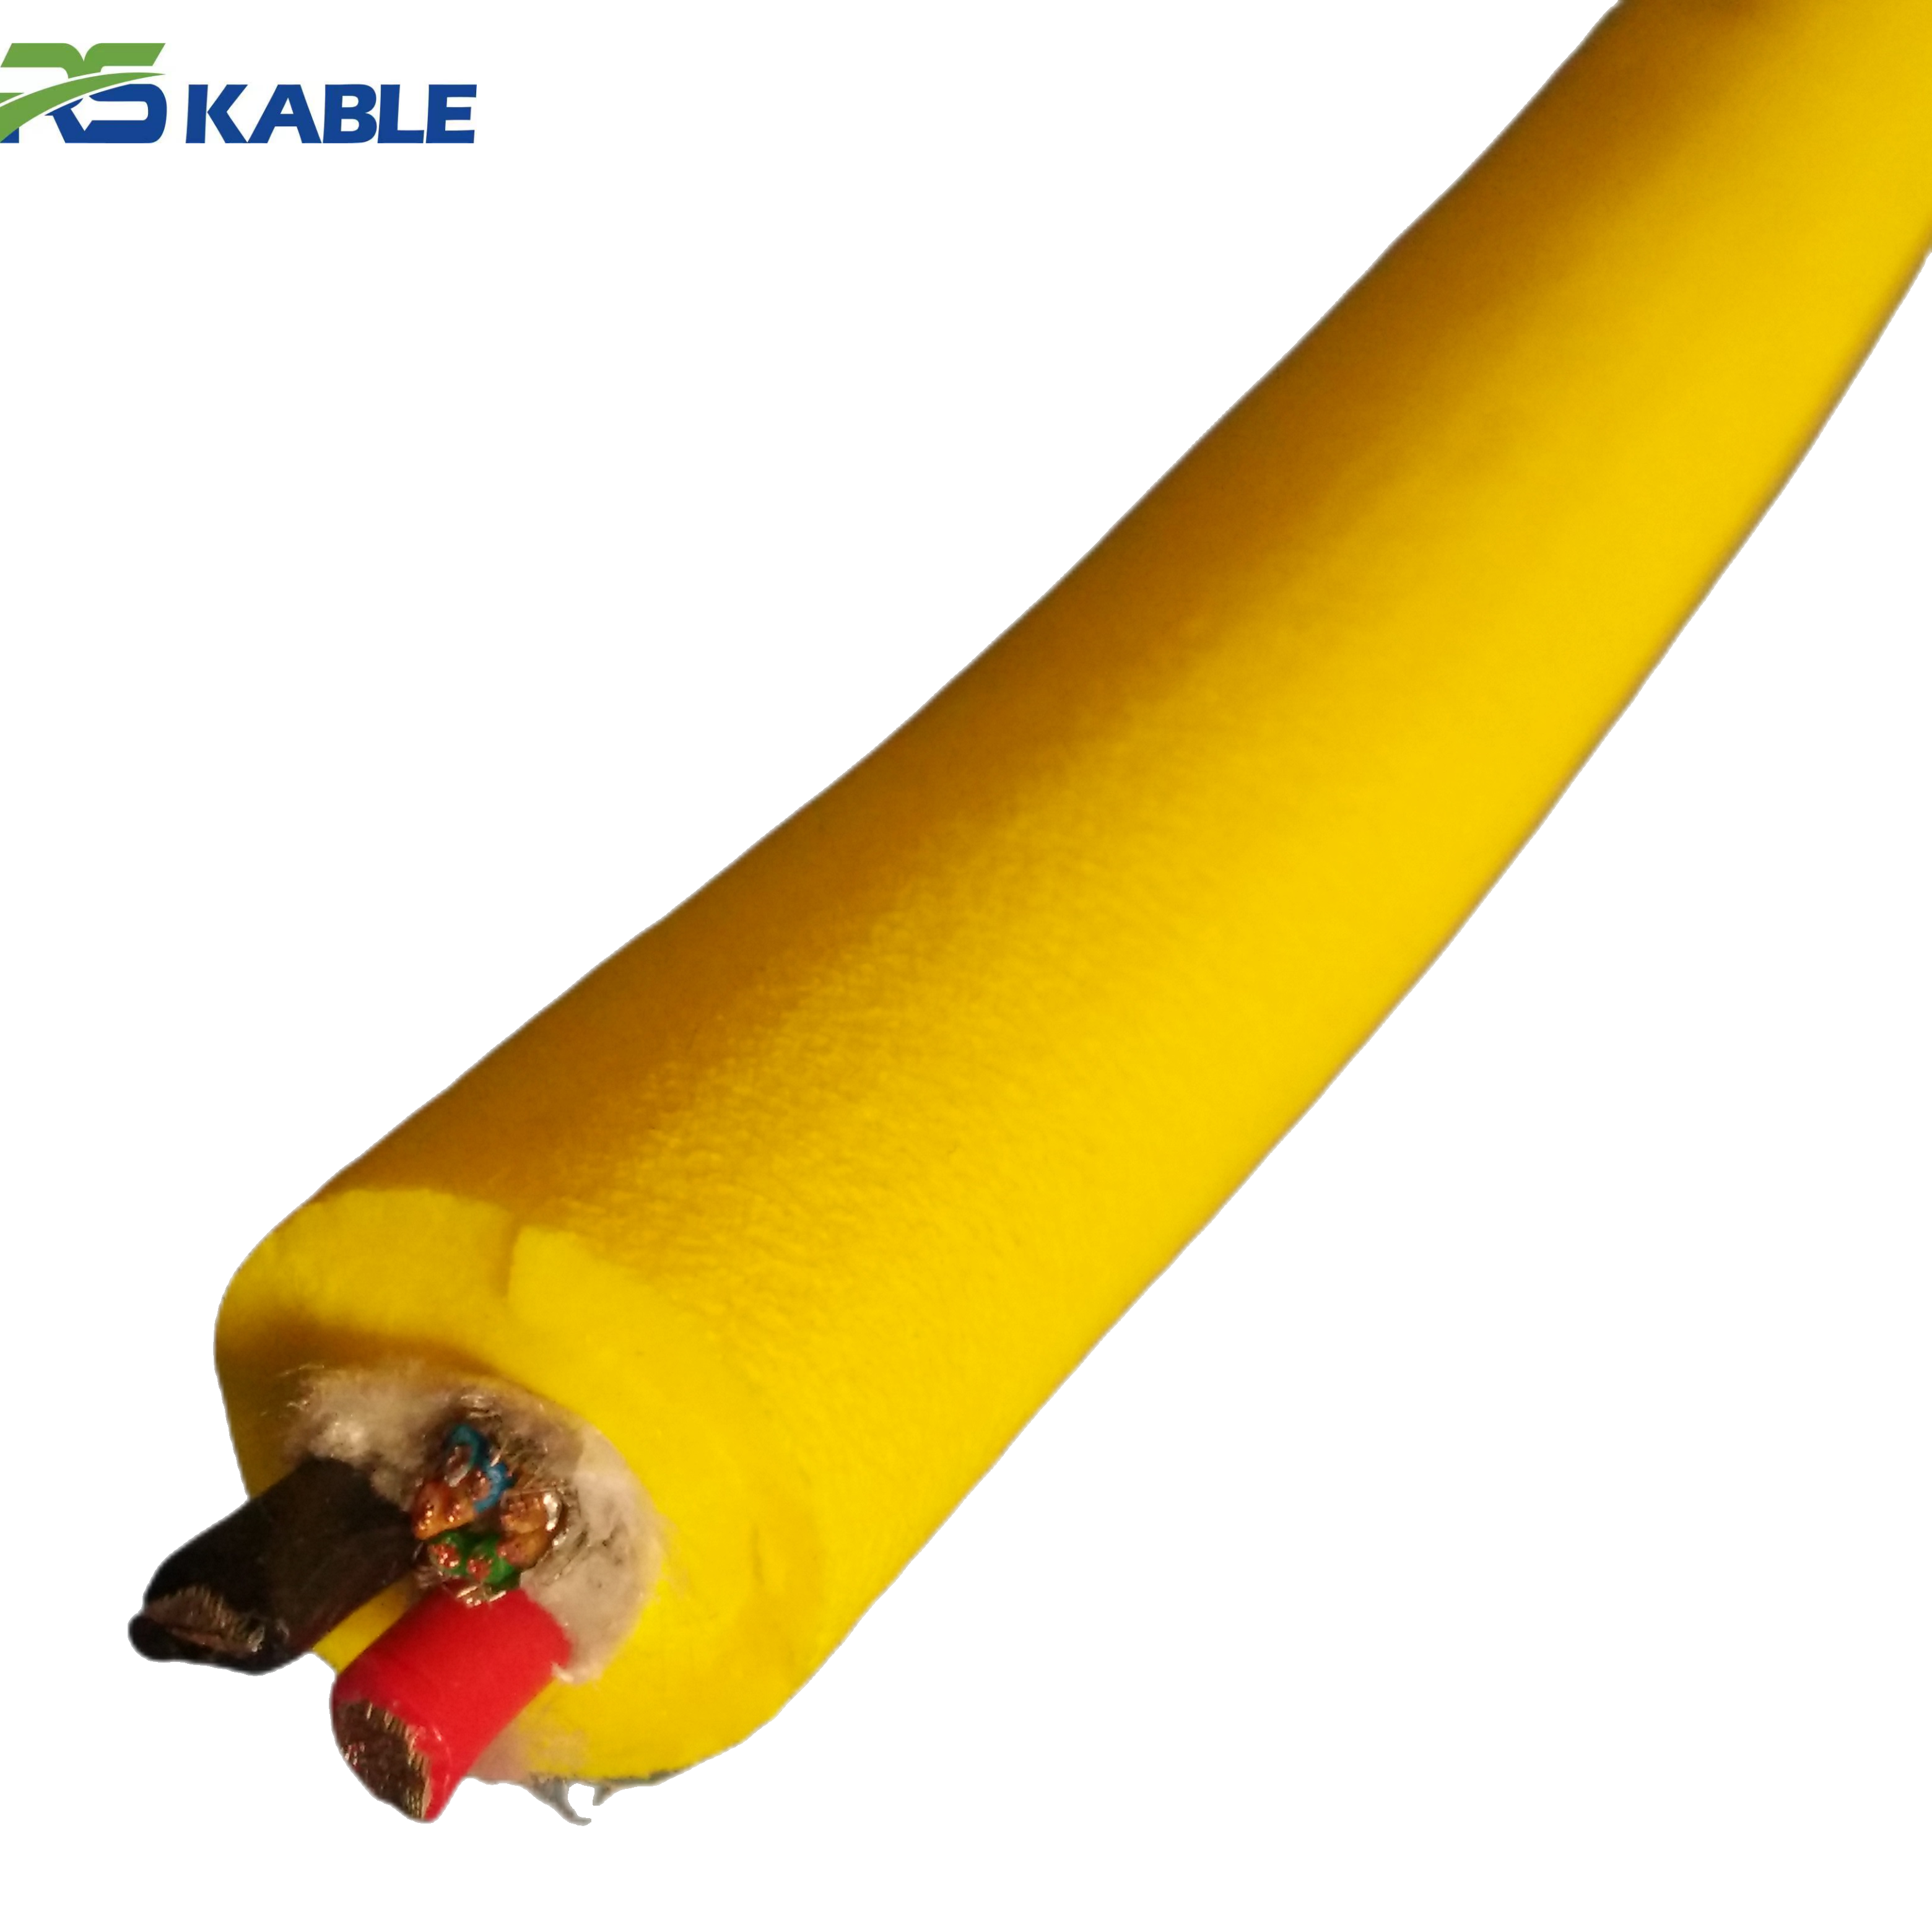
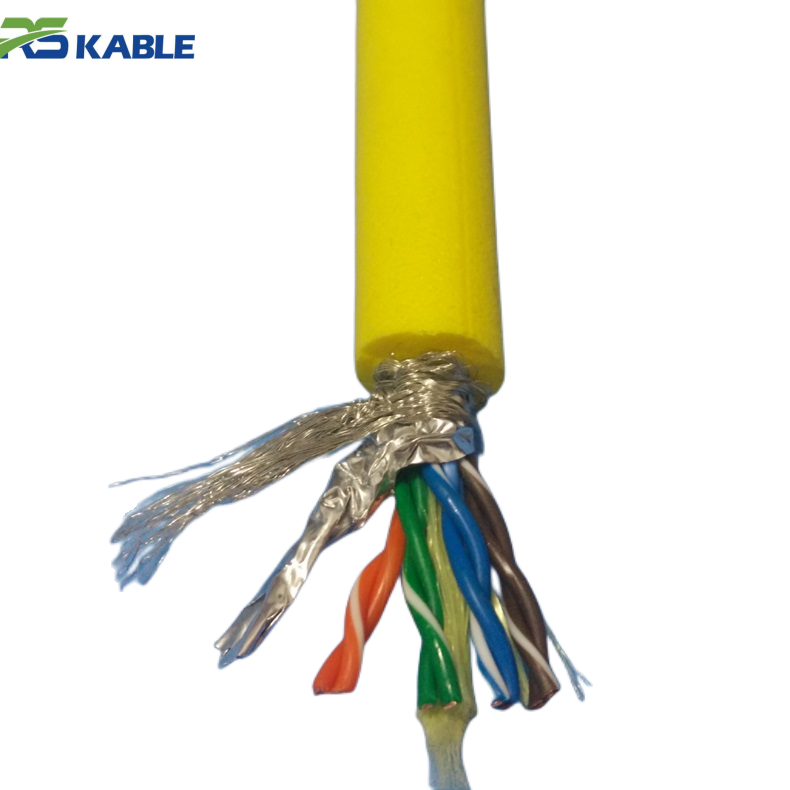
Subsea Sensor Networks Neutral Buoyancy Cable | Anti-Corrosion & Shielded Structure for Long Service Life
Optimized for **permanent subsea sensor networks**, this **neutral buoyancy cable** features an advanced **anti-corrosion design** and a **high-density shielded structure**. It ensures interference-free data transmission and a long service life in deep-sea environments, making it the perfect tether for continuous oceanographic monitoring and underwater telemetry.
The Mechanism: Cable Geometry Creates Hidden Time
Underwater, the tether forms a catenary (a curved profile). That profile determines:
-
how much of the cable contacts the seabed
-
the “sweep zone” the cable occupies in current
-
how much tension reaches the vehicle or tow body
-
how predictable vehicle behavior feels during turns and depth changes
Traditional underwater cables are often negatively buoyant, which increases sag. In dynamic missions, sag increases seabed contact and expands the sweep zone—two major drivers of hidden time.
A Neutral Buoyancy Cable reduces effective in-water weight, typically reducing deep sag and making the catenary more controllable. That improvement is what drives most efficiency gains.
Decision Matrix: When Neutral Buoyancy Usually Saves the Most Time
Use this matrix to decide quickly whether neutral buoyancy is likely to produce measurable efficiency improvements.
Best-fit missions (high efficiency upside)
Neutral buoyancy is usually worth evaluating when:
-
the cable is dynamic (ROV tether, towed survey, diver umbilical)
-
the worksite is structure-heavy (pipelines, frames, rigs, debris zones)
-
seabed drag events are frequent or costly
-
currents amplify sweep and make station-keeping difficult
-
pilots must slow down because the tether behaves unpredictably
-
termination fatigue or intermittent faults are recurring issues
Mixed-fit missions (may still help, but verify)
Consider near-neutral or slightly negative when:
-
shallow operations have wave/surface influence
-
strong current creates sweep risk but surface looping is also a concern
-
some bottom contact is unavoidable and abrasion protection is critical
Poor-fit missions (traditional cable may be more efficient)
Traditional negatively buoyant cable can be more efficient when:
-
the cable is routed on the seabed and remains mostly static
-
the system is anchored and geometry is controlled by structures
-
you need the cable to stay down and avoid surface influence
-
movement is minimal and rugged protection is the dominant requirement
Efficiency comes from fit-to-mission, not from choosing the “most advanced” option.
6 Efficiency Gains Neutral Buoyancy Delivers in Real Operations
Below are the efficiency improvements teams most commonly experience when cable behavior becomes more predictable.
1) Fewer seabed drag events and less abrasion downtime
Bottom drag creates “time tax” in three ways: pilots slow down, operators reposition to free the tether, and jacket wear increases risk.
Neutral buoyancy reduces the tendency of slack to collapse into bottom loops, especially during close inspection work.
2) Lower pilot workload and better station-keeping in current
When the tether pulls down, the ROV spends thrust just holding depth. When the tether sweeps widely, the pilot spends time correcting drift.
A Neutral Buoyancy Cable reduces vertical load and often improves cable geometry stability, helping pilots complete tasks with fewer corrections.
3) Reduced snag/entanglement interruptions near structures
Entanglement often starts with slack plus seabed contact. A heavy tether collapses downward more easily, increasing bottom-loop snag probability.
Neutral buoyancy helps keep the tether in a cleaner arc, reducing wrap risk and the time lost to “unwinding” situations.
4) More consistent towing and fewer re-runs in survey work
Towed bodies and sonar arrays suffer when tension fluctuates and depth “hunts.”
Neutral buoyancy can stabilize geometry and reduce tension fluctuation, improving consistency and reducing the need for repeat passes.
5) Fewer intermittent faults from termination stress
Many “mystery” issues offshore are termination fatigue issues that appear under movement: video dropouts, telemetry flicker, or noise.
Reducing sustained load helps terminations live longer and lowers troubleshooting downtime.
6) More tasks completed per shift (the real KPI)
The most useful efficiency metric is not speed—it’s planned tasks completed per shift. When tether behavior becomes predictable, crews stop losing hours to preventable interruptions.
Field Cues: Symptoms That Your Cable Is Costing You Efficiency
These are common signals that the cable—rather than the vehicle—is the efficiency bottleneck:
-
frequent jacket scuffing or repeated seabed contact
-
“sticky” tether behavior during turns near structures
-
pilot must constantly add lift thrust to maintain altitude
-
station-keeping requires excessive power in moderate current
-
sudden tension changes during heading changes
-
intermittent comms/video faults that appear mainly while moving
-
repeated micro-recoveries and repositioning to manage tether sweep
If you see several of these in the same operation, buoyancy strategy is a high-priority optimization.
Symptom → Diagnosis → Fix: Fast Operational Troubleshooting
Symptom A: “We lose time repositioning because the tether drags”
Diagnosis: too-negative in-water weight + slack + current-driven sag
Fix: move toward near-neutral buoyancy, tighten pay-out discipline, add abrasion sleeves at unavoidable contact zones.
Symptom B: “Pilots operate cautiously because the tether sweeps into hazards”
Diagnosis: wide low catenary + drag diameter + structure density
Fix: reduce diameter/drag where possible, use near-neutral buoyancy to reduce sag, plan approach angles to reduce sweep into obstacles.
Symptom C: “Comms/video faults appear during movement, not during static checks”
Diagnosis: termination strain relief fatigue or bend radius violations
Fix: strengthen termination/strain relief, validate bend radius in real handling, prioritize fatigue suitability in specification.
Symptom D: “In shallow water, we see looping or unstable tether behavior”
Diagnosis: too-positive buoyancy or excessive slack, plus surface influence
Fix: target near-neutral or slightly negative buoyancy, reduce slack, operate deeper when possible to reduce wave-driven motion.
These are not theoretical fixes—they match the patterns that create repeated downtime offshore.
Choosing a Neutral Buoyancy Cable That Actually Delivers (Not Just a Label)
Neutral buoyancy only improves efficiency if the cable is consistent and suited to the mission. Focus on these parameters:
1) Buoyancy range and consistency
Ask for buoyancy tolerance and uniformity along length. Inconsistent buoyancy creates unpredictable geometry.
2) Diameter and drag profile
A neutrally buoyant cable can still create high drag if the diameter is large. Drag drives sweep and pilot workload in current.
3) Strength and reinforcement
Ensure tensile margin for handling, recovery, and tension spikes. Reinforcement design matters for real-world reliability.
4) Bend radius and fatigue duty
Efficiency gains disappear if the cable fails early. Fatigue performance is critical near terminations.
5) Jacket durability for abrasion environments
If contact is possible, jacket design influences lifecycle cost more than minor electrical differences.
6) Termination method and strain relief
Terminations are often the downtime source. Prioritize robust strain relief and connector compatibility.
A Neutral Buoyancy Cable is most efficient when buoyancy, drag, fatigue, and termination design are engineered together.
Acceptance & Quick Verification: How to Confirm You Got What You Bought
To increase trust and reduce surprises, use these practical checks before deployment:
Incoming inspection (on deck)
-
confirm uniform outer diameter and jacket condition
-
check for handling damage from transport
-
verify termination strain relief and connector integrity
Quick buoyancy sanity check (simple field method)
-
observe whether sections behave consistently (no obvious “sinking segments”)
-
confirm the tether does not collapse aggressively into bottom loops when slack is present
-
document any sections that behave differently (inconsistency is a red flag)
Handling verification
-
confirm minimum bend radius can be respected during pay-out and recovery
-
confirm storage and routing avoid sharp edges and pinch points
-
define who controls slack and when adjustments happen (procedure prevents hidden time)
These checks make the difference between “we bought neutral buoyancy” and “we got consistent operational benefit.”
How to Prove ROI Internally (Efficiency Metrics That Matter)
If you need to justify cost, track efficiency with operational metrics:
-
number of recoveries/re-deployments per shift
-
time spent correcting tether drag and sweep
-
number of snag/entanglement near-misses
-
time lost to intermittent comms/video faults
-
termination replacement frequency
-
percentage of planned tasks completed per shift
Neutral buoyancy delivers value when these metrics improve—not when the cable looks “more advanced.”
FAQ
How do I justify neutral buoyancy cable cost to management?
Track recoveries, time lost to tether drag, snag near-misses, intermittent faults, and tasks completed per shift. Efficiency gains show up in reduced downtime.
What is the fastest sign neutral buoyancy will save time on my project?
Frequent seabed drag, heavy pilot workload in current, repeated snag avoidance, and cable-related interruptions are strong indicators.
Is neutral buoyancy always more efficient than traditional underwater cable?
No. For fixed seabed routing where the cable is meant to stay down and movement is minimal, traditional cable can be more efficient.
Can neutral buoyancy reduce downtime from termination failures?
It can help by lowering sustained tension and reducing stress at strain relief zones, but termination design and handling still matter.
Why does my tether drag more in current even with good piloting?
Current changes the catenary and increases sweep. If buoyancy is too negative or slack is high, bottom contact increases. Buoyancy strategy and pay-out control usually fix it.